
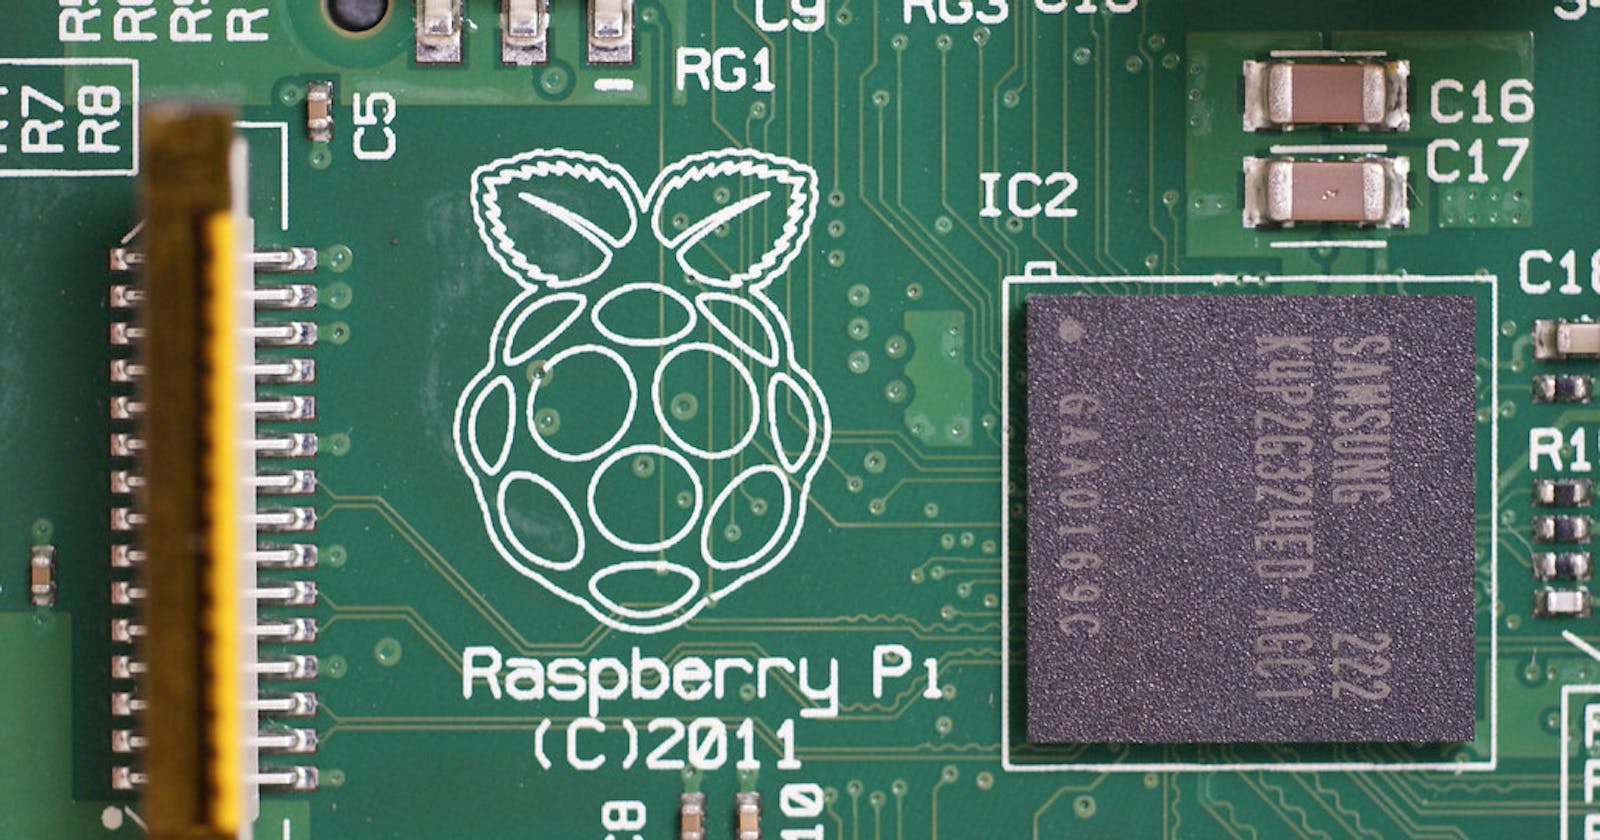

So, I got to experiment twice with raspberry pi - once to download the new Windows 11 ISO file and the other to download Ubuntu ISO image. So I teamed up with a friend of mine and started doing this experiment. Before I proceed, what is raspberry pi - it is a computer which requires its own power source, a monitor where it displays results, a keyboard and a mouse. For me, this was totally unknown. In one of the experiments, we thought we plugged everything in and were wondering why the contents of the pi were not being read. Later on, we discovered we have not plugged the power source in and we were looking sheepishly at each other. Well, that's a joke to begin with. Now, coming back to the entire process of it.
1. Getting all the pre-requisites ready
I learnt the hard way that getting all the pre-requisites ready and listing them down is so important. In my experiment, I did not research of what I required for a raspberry pi and the wire and connectors that we would be requiring. So we spent a lot of effort in assembling the things and listing them out and then buying them. A lot of time was spent on it. Lesson learnt: lt is important to list down or draw a sketch of what I need and list it out. It saves time.
2. Documenting the steps and keeping spare devices handy
So while doing this experiment we downloaded raspberry pi imager from raspberry pi official site and selected the type of OS and device where we want the OS to be installed. Now, here we required a microSD card reader and a microSD card on where we want to install the OS. We chose Ubuntu Desktop 20.0.9 OS and microSD card as the device. We ran into an issue of writing the image file and figured out that there was an issue with the microSD card reader being used. Fortunately, we had a spare microSD card reader through which we wrote the image on the microSD card. Lesson learnt: Keep spare devices handy and document the steps
3. Do not follow tutorials blindly
So, in this fun experiment, we were trying to connect DSLR camera with raspberry pi and control the camera with it. We followed this link Raspberry Pi DSLR Camera Control and it was useful to some extent. This link helps in installation of gphoto2 software which enables my Raspberry Pi to control the camera to perform actions such as taking photos, downloading files from the camera and setting configuration on the camera. So for this process, in addition, we required a DSLR camera which we want to connect with raspberry pi, ethernet cord or wifi, monitor, keyboard and mouse. So, we followed all the steps till we got stuck where the camera was not detected by the raspberry pi. Here, we searched other links and browsers to find out what the issue could be: whether it was DSLR issue, compatibility issue or was something else the case? We went through other links and we finally let go of the experiment and failed spectacularly.
4. It is better to do experiment with peers
Experimenting with peers was definitely fun because it led to cracking jokes, more heads are definitely more than one and we covered expanse in debugging and came up with different sorts of questions to resolve the issue. It would not have been fun without peers. It was fun cracking jokes, thinking of what went wrong, failing fast and going on to the next step
Well, so far this is what I experimented with. It is fun learning about Raspberry pi. In my first experiment, I learnt about how to use Rufus and had fun in creating a bootable disk for Windows 11 image. Well, that's that for now. Adieu Amigos